This project focuses on doing the work that actually makes a fire pit last. A flush, ground-level fire pit looks clean and intentional, but the key is what’s under the surface. These steps walk through how to build it correctly so it stays level through seasons of use.
Tools You’ll Need Shovel and flat spade Wheelbarrow
Tape measure, stakes, or marking paint 4–6 ft level or a long straight board Hand tamper or plate compactor Rubber mallet Push broom Angle grinder with masonry blade (for cuts)
Materials Crushed stone or paver base
Concrete or paver sand Fire-rated bricks or a steel fire pit ring Patio pavers Gravel for drainage
Edge restraint and spikes or a locking border Joint sand or polymeric sand
Step 1: Layout and Planning
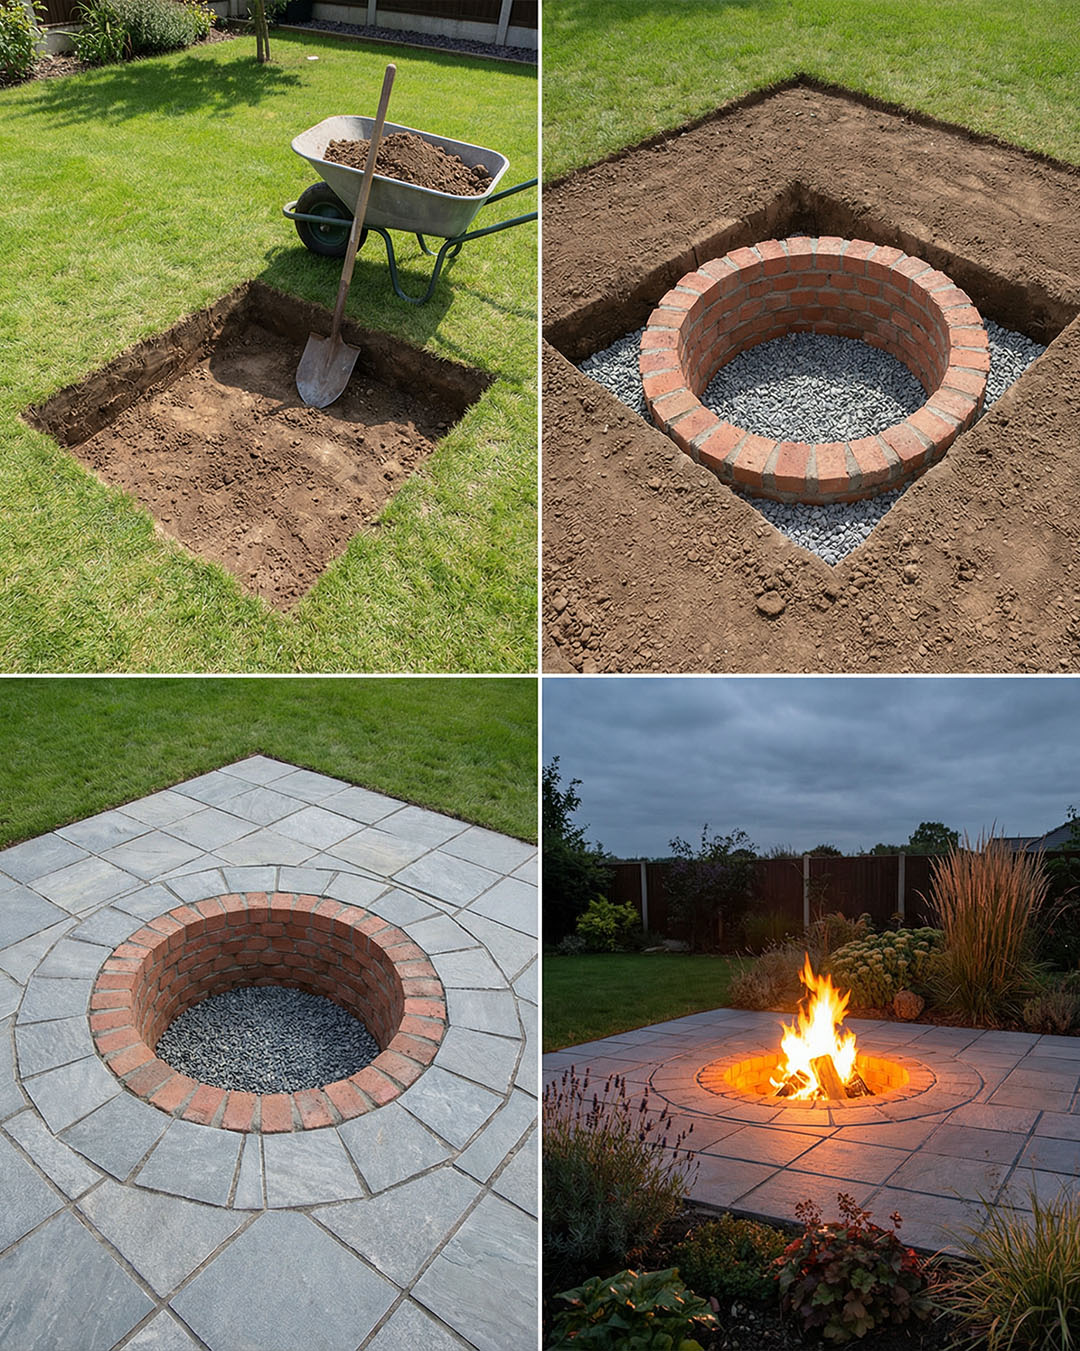
Choose the fire pit size first, then plan the surrounding patio space. Mark the square patio area and the circular fire pit in the center. Keep the finished surface level with the lawn so the pit blends naturally into the yard.
Step 2: Excavate Deep Enough
Remove sod and dig down the entire patio area. Depth matters more than anything else, especially in freeze-thaw climates. Compact the soil firmly before moving on. Soft soil now means shifting later.
Step 3: Build a Solid Base
Add crushed stone in thin layers, compacting each layer thoroughly. This creates a stable foundation that resists movement from moisture and temperature changes. Check level often and add a slight slope away from nearby structures to help with drainage.
Step 4: Screed the Bedding Layer
Add a thin layer of sand and screed it flat using a straight board. This layer allows precise leveling of the pavers. Keep the surface smooth and avoid disturbing it once it’s set.
Step 5: Install the Fire Pit Ring
Dig the center slightly deeper and add gravel for drainage. Set the fire pit ring or fire-rated bricks so they are level and stable. A steel insert helps protect surrounding pavers from heat and extends the life of the build.
Step 6: Lay the Pavers Start at the fire pit and work outward. Set each paver firmly, tapping it into place with a rubber mallet. Check level across multiple directions and make adjustments as needed. Taking time here prevents uneven surfaces later.
Step 7: Lock the Edges
Install edge restraint around the patio to prevent spreading and shifting over time. Backfill and compact soil along the outside edges to secure everything in place.
Step 8: Compact and Fill Joints
Compact the pavers to seat them fully into the base. Sweep sand into the joints and repeat until joints stay filled. This locks the surface together and improves long-term durability.
Tips for Long-Term Durability
Compact every layer thoroughly
Use crushed stone, not rounded gravel, for the base
Plan for drainage so water doesn’t pool under the patio
Install edge restraint to prevent movement
Re-fill joints occasionally after winter settling
A fire pit built this way stays level, drains properly, and looks good year after year. The extra effort below ground is what turns a simple fire pit into a permanent, reliable outdoor feature.