Last year, my wife and I embarked on a fun and rewarding project: building our very own cozy 10×16 campsite. With our love for the outdoors and a desire to create a private getaway for relaxation and adventure, we decided to take on the challenge of designing and constructing a space that would provide us with a comfortable retreat, all while blending seamlessly with nature. The experience was not only fulfilling but also allowed us to bring our vision to life, creating a perfect spot for weekend getaways, family gatherings, and quiet nights under the stars.
In this article, I’ll walk you through the process of how we built our 10×16 campsite, from planning and design to construction and finishing touches.
Step 1: Planning and Design
Before we dove into the physical work, we knew we needed to plan carefully. The first task was deciding on the overall design, considering factors like the layout, materials, and the campsite’s purpose.
Choosing the Location
The location of the campsite was the first big decision. We scouted several areas around our property, looking for a flat, stable spot that was close enough to our home for convenience but far enough to offer privacy and escape. We also considered the natural surroundings, ensuring that the campsite would blend into the landscape without disturbing the local flora and fauna.
Once we found the perfect spot, we measured the space to make sure a 10×16 structure would fit comfortably while still leaving room for a campfire pit, seating, and outdoor activities.
Designing the Campsite Layout
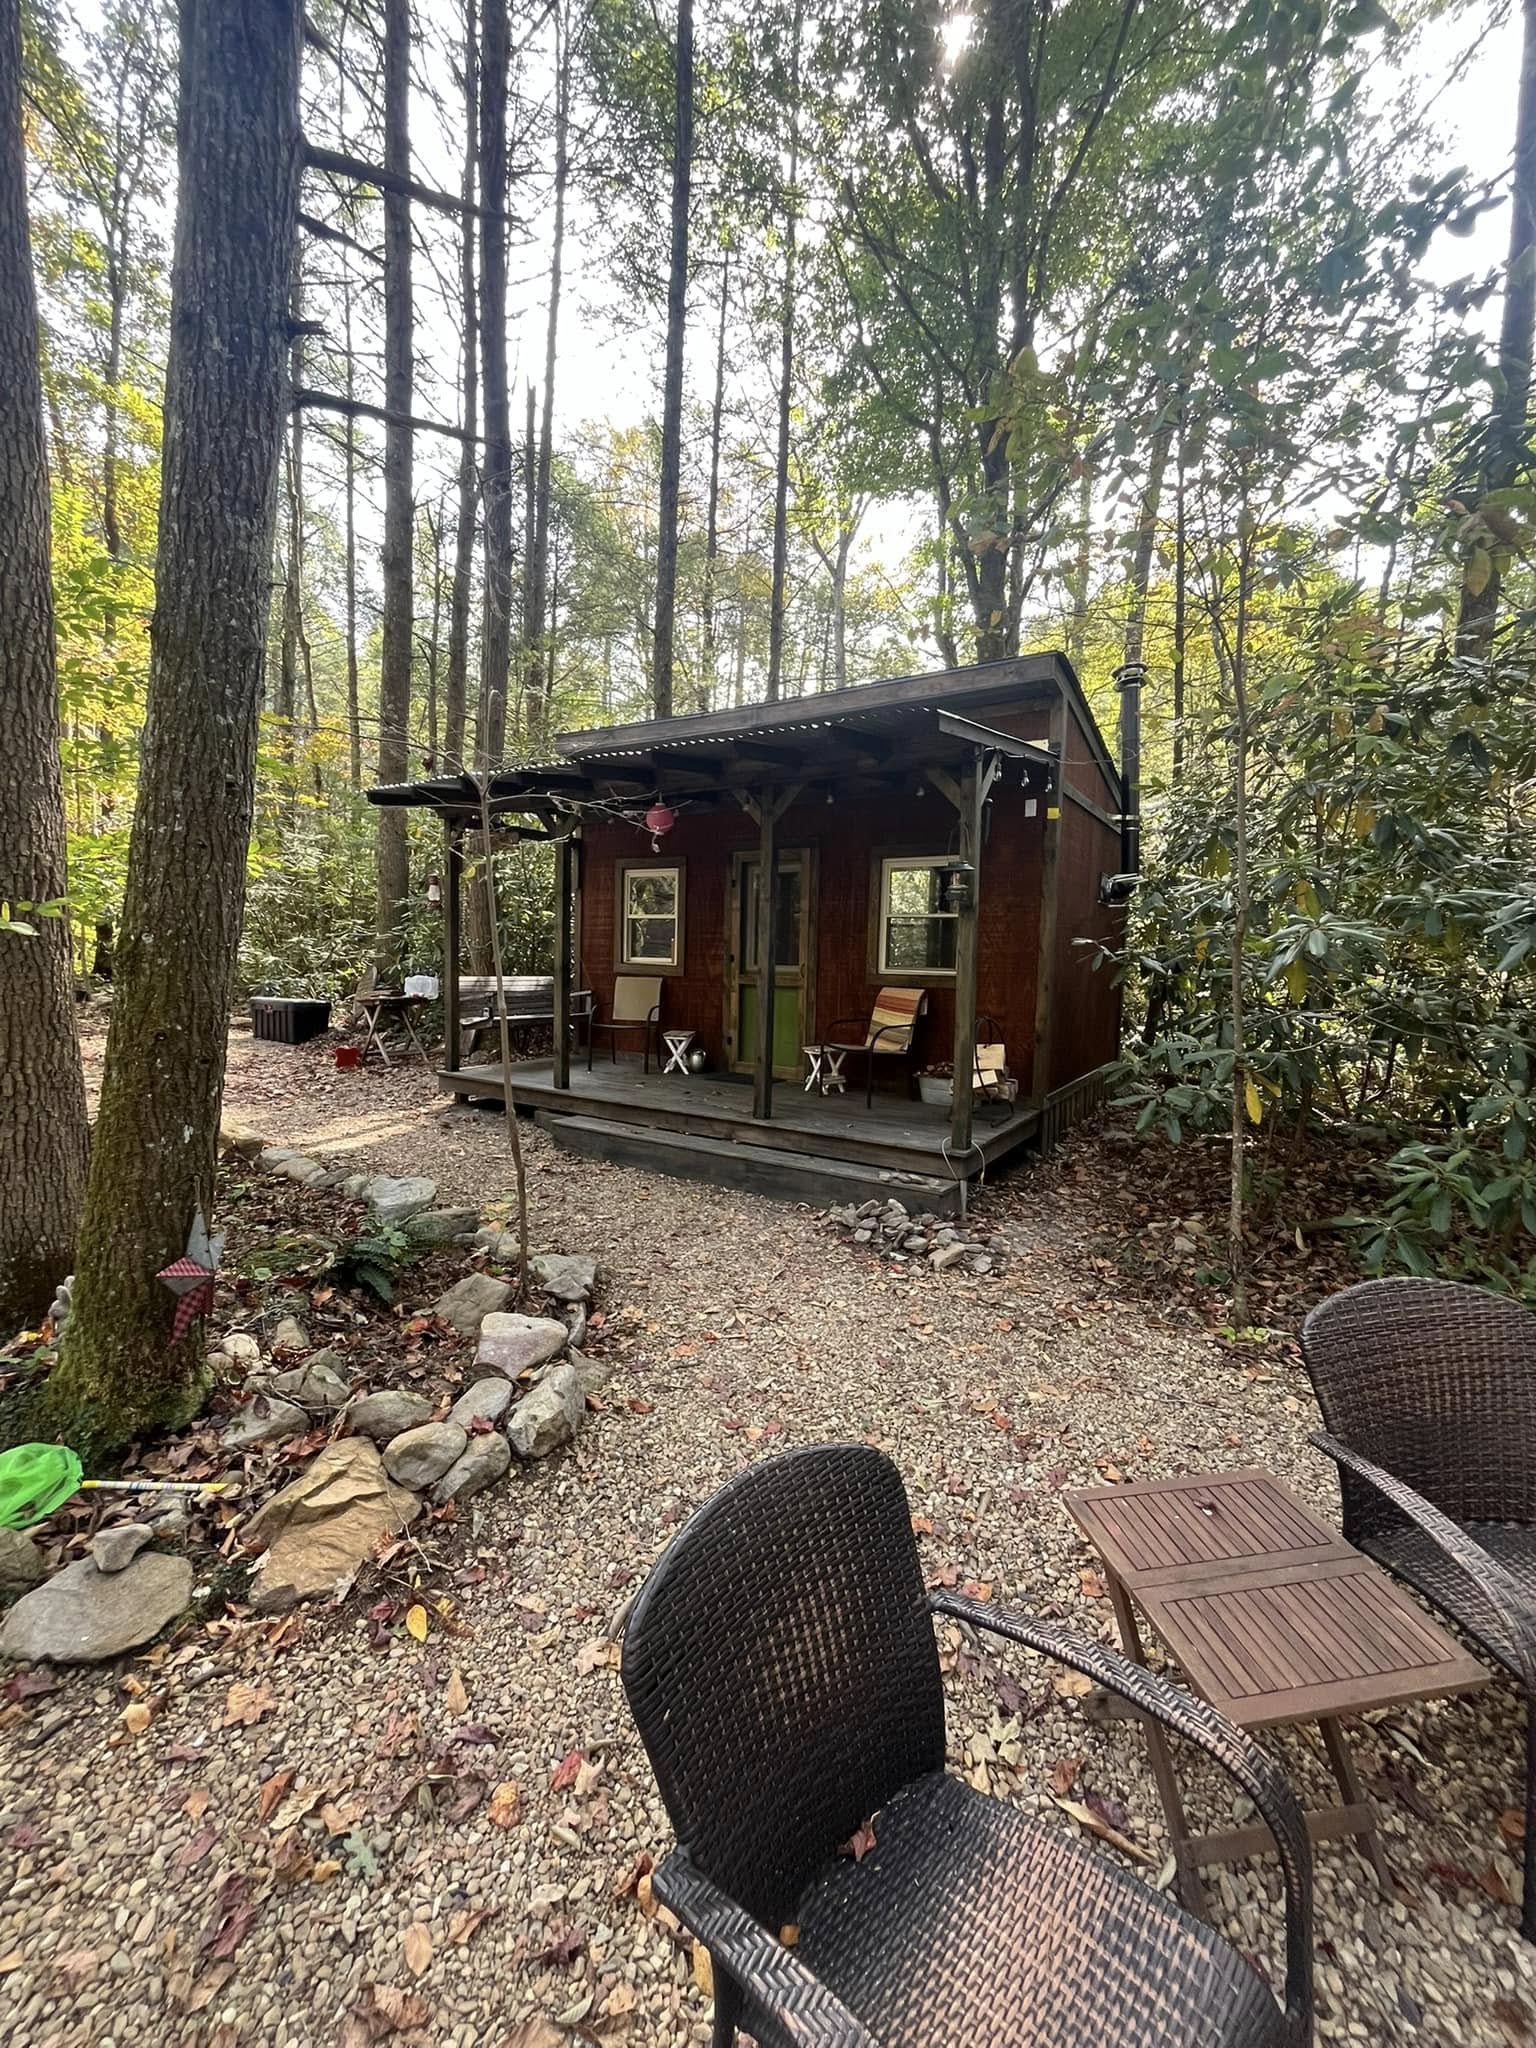
Next, we started sketching out the design. We envisioned a small, rustic structure with a spacious interior, a welcoming porch, and room for camping gear and furniture. The 10×16 size was ideal—it was big enough to fit all the essentials but small enough to maintain a cozy, intimate feel.
Our design included:
- A front porch for relaxing and enjoying the outdoors
- A small interior area for a bed or hammock
- Ample storage space for camping equipment, firewood, and gear
- Windows and a screened-in door to let in fresh air and natural light
- A roof that would provide shelter while still giving us the feeling of being outdoors
Selecting Materials
After finalizing the design, we had to choose materials that would be both durable and aesthetically pleasing. Since we wanted the campsite to blend with its surroundings, we chose natural materials like wood for the structure. We also opted for a metal roof to withstand the elements, ensuring that the campsite would be durable and long-lasting.
Step 2: Gathering Supplies and Preparing the Site
With our design in place, it was time to gather supplies and prepare the site for construction.
Supplies
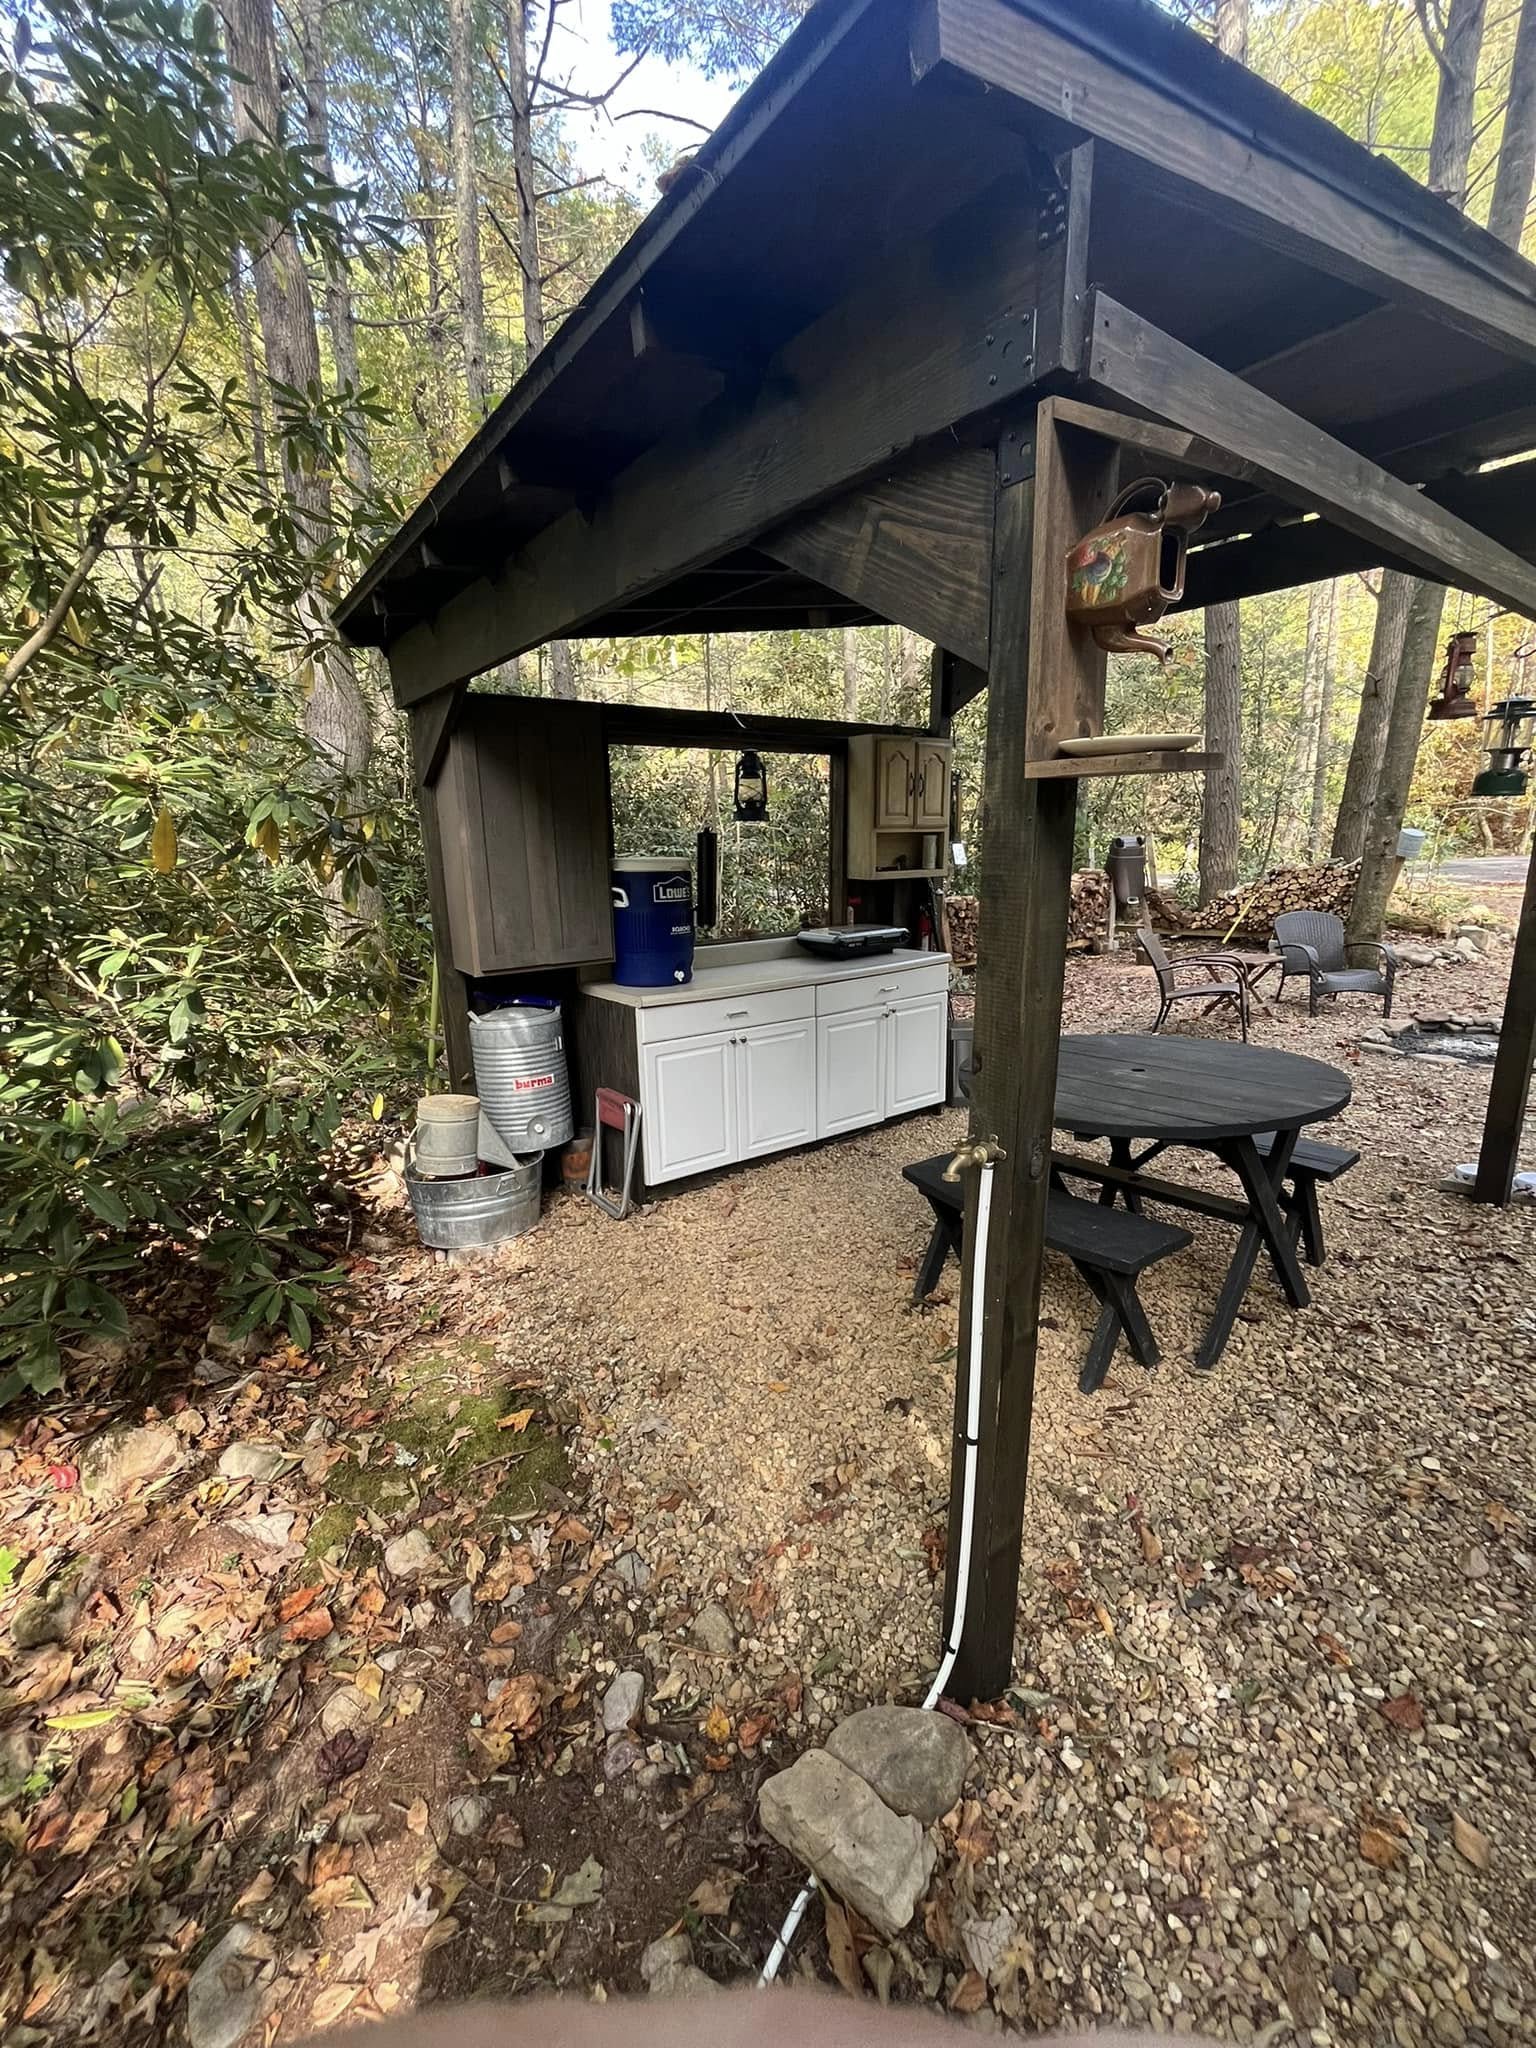
We sourced all the materials needed for the structure, including pressure-treated lumber for the frame, plywood for the walls, roofing material, insulation, and hardware like screws and nails. We also purchased outdoor paint to protect the wood and make the campsite look polished.
We didn’t rush to buy everything at once; instead, we built up our materials gradually to avoid being overwhelmed by the cost or the amount of material we had to store.
Preparing the Site
Before we could begin building, we needed to prepare the ground. We leveled the site to ensure a solid foundation for the structure. Using a shovel, rake, and leveler, we removed any rocks or debris and flattened the area. This was a crucial step in ensuring the campsite would sit securely and remain stable over time.
We also created a simple foundation using concrete blocks to elevate the structure off the ground. This helped to protect the wood from moisture and allowed air to circulate underneath, preventing mold and rot.
Step 3: Building the Structure
Now that the site was prepared and we had all our materials, it was time to start the construction process. While this step was the most physically demanding, it was also the most rewarding as we began to see our vision take shape.
Building the Frame
We began by constructing the frame of the structure, starting with the floor. Using pressure-treated lumber, we built a sturdy rectangular frame and placed it on the concrete blocks. We then installed cross beams for added support.
Once the floor was in place, we built the walls by attaching vertical studs to the frame. The walls were constructed using plywood, which we cut to size and secured with nails. We made sure to leave space for windows and the door.
Constructing the Roof
After the walls were up, we moved on to the roof. The roof was the most important element to ensure the campsite could handle rain and other weather conditions. We used wooden rafters for the frame, attaching them securely to the top of the walls. We then covered the roof with corrugated metal sheets, which we nailed into place.
The slanted roof allowed for proper water drainage and helped prevent pooling of rainwater. We also added a small overhang around the edges to protect the walls from the elements.
Step 4: Adding the Finishing Touches
Once the basic structure was complete, it was time to focus on the details. These finishing touches made the campsite feel more like home and added a touch of charm.
Porch and Steps
The front porch was one of the elements I was most excited about. We built a simple wooden platform with railings and added a set of steps leading up to the door. The porch serves as a perfect spot for sitting, relaxing, and enjoying the view, especially during warm evenings.
Windows and Doors
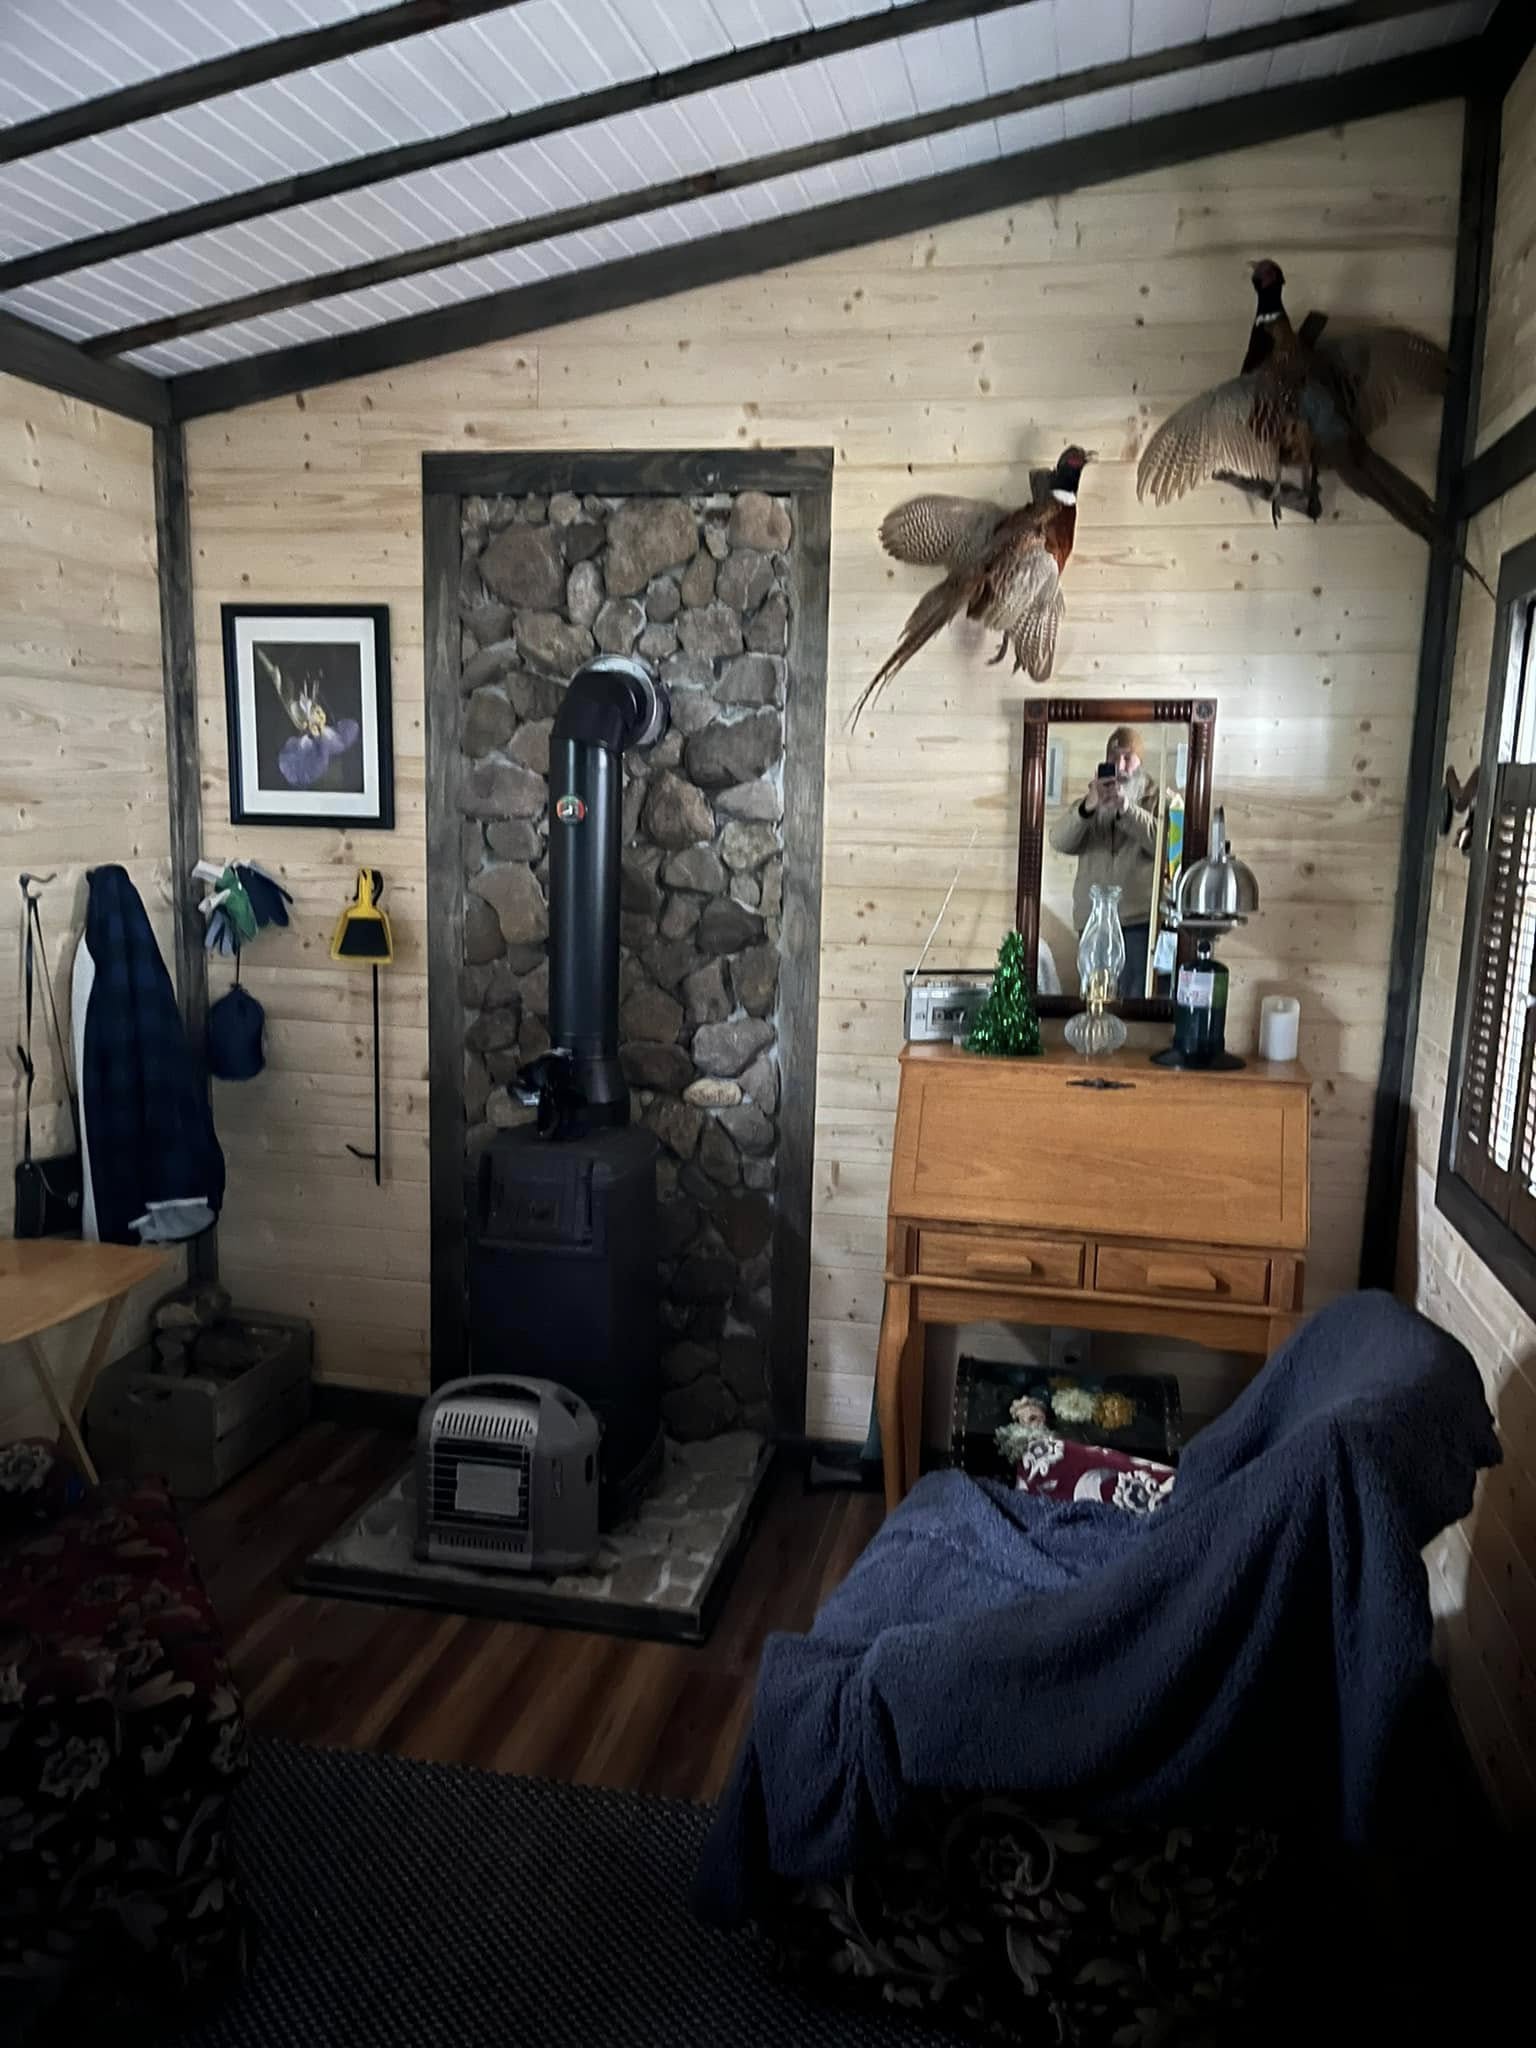
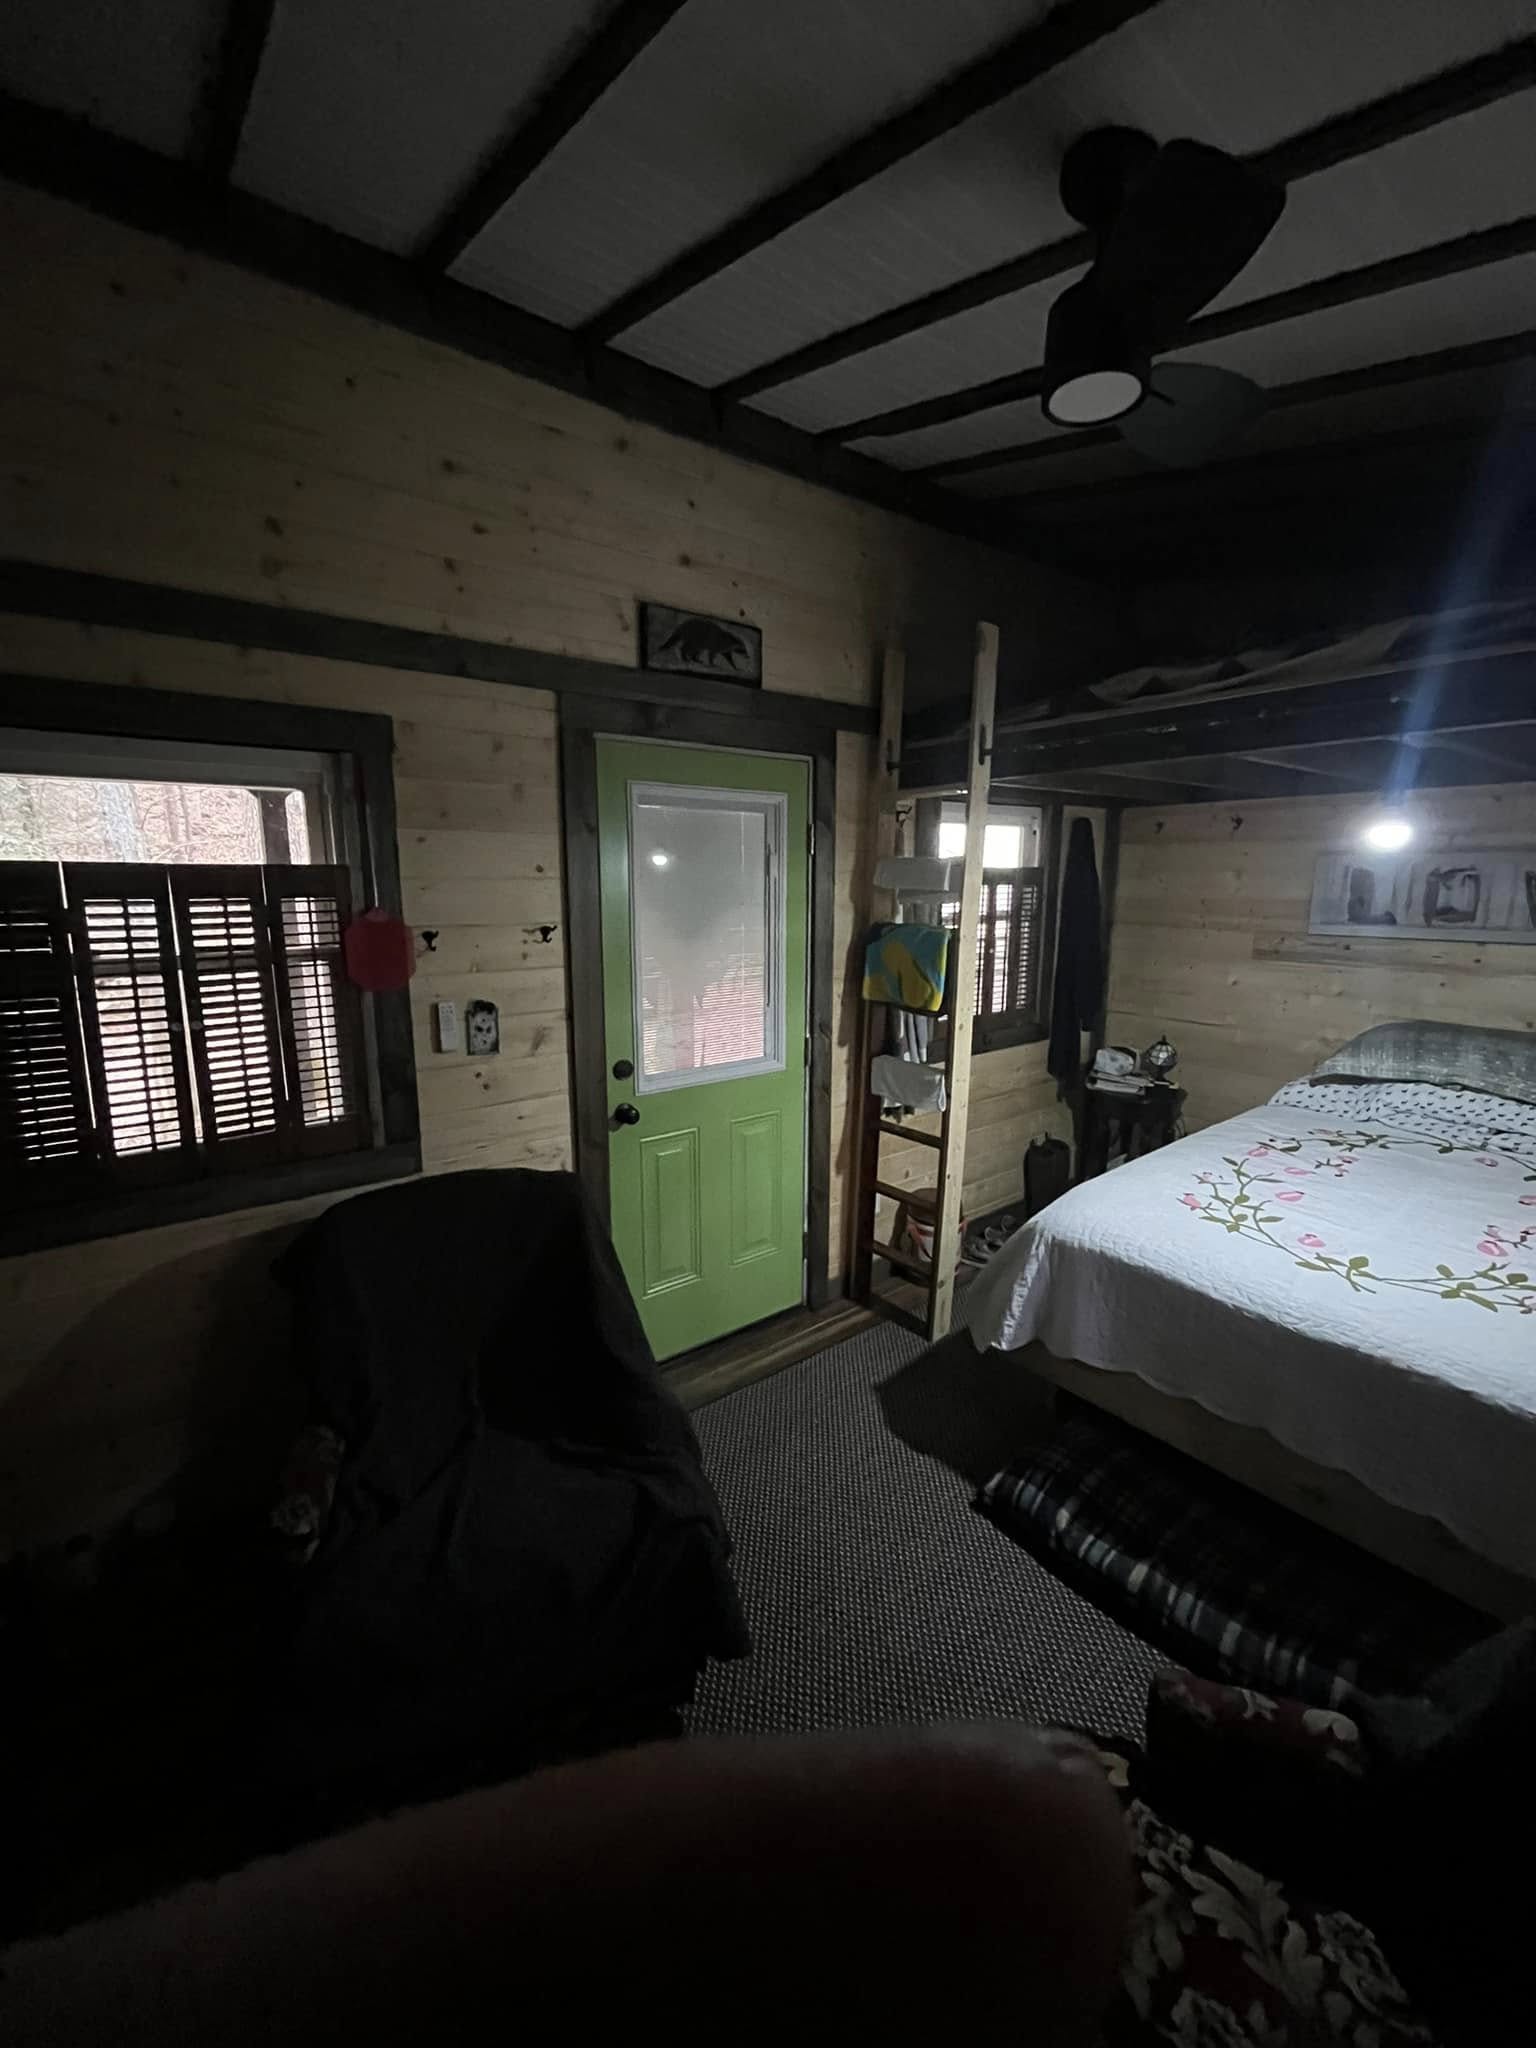
We installed large windows on all sides of the campsite to maximize natural light and create a more open, airy feel. To keep bugs out while allowing fresh air in, we added a screened-in door and mesh screens on the windows.
Interior and Storage
On the inside, we created a small but functional space. We built a lofted platform for a bed, which gave us extra storage room underneath. The rest of the interior was simple, with shelving for gear and hooks for hanging equipment. The space was perfect for storing camping essentials and relaxing after a long day outdoors.
We also painted the exterior of the campsite with weather-resistant paint to protect the wood and give it a polished look that blended with the natural environment.
Step 5: Enjoying Our New Getaway
After several weeks of hard work, our 10×16 campsite was finally complete. We couldn’t wait to spend our first night in it. We set up a campfire in the designated pit, placed a few cozy chairs on the porch, and watched the sunset as we sipped hot cocoa.
The campsite has since become our go-to retreat. Whether it’s for a weekend getaway, a family gathering, or simply a peaceful night in nature, the space provides us with everything we need to enjoy the outdoors in comfort and style.
Conclusion: A Labor of Love
Building our 10×16 campsite was not just a project—it was an experience that brought us closer together and helped us create something meaningful. From the planning and design to the construction and finishing touches, every step of the process was rewarding. We are now able to enjoy a comfortable, rustic retreat that allows us to disconnect from the stresses of daily life and reconnect with nature.
For anyone considering building their own campsite or outdoor retreat, I highly recommend taking on the challenge. It’s a wonderful way to bond, learn new skills, and create a space that you and your loved ones can enjoy for years to come.