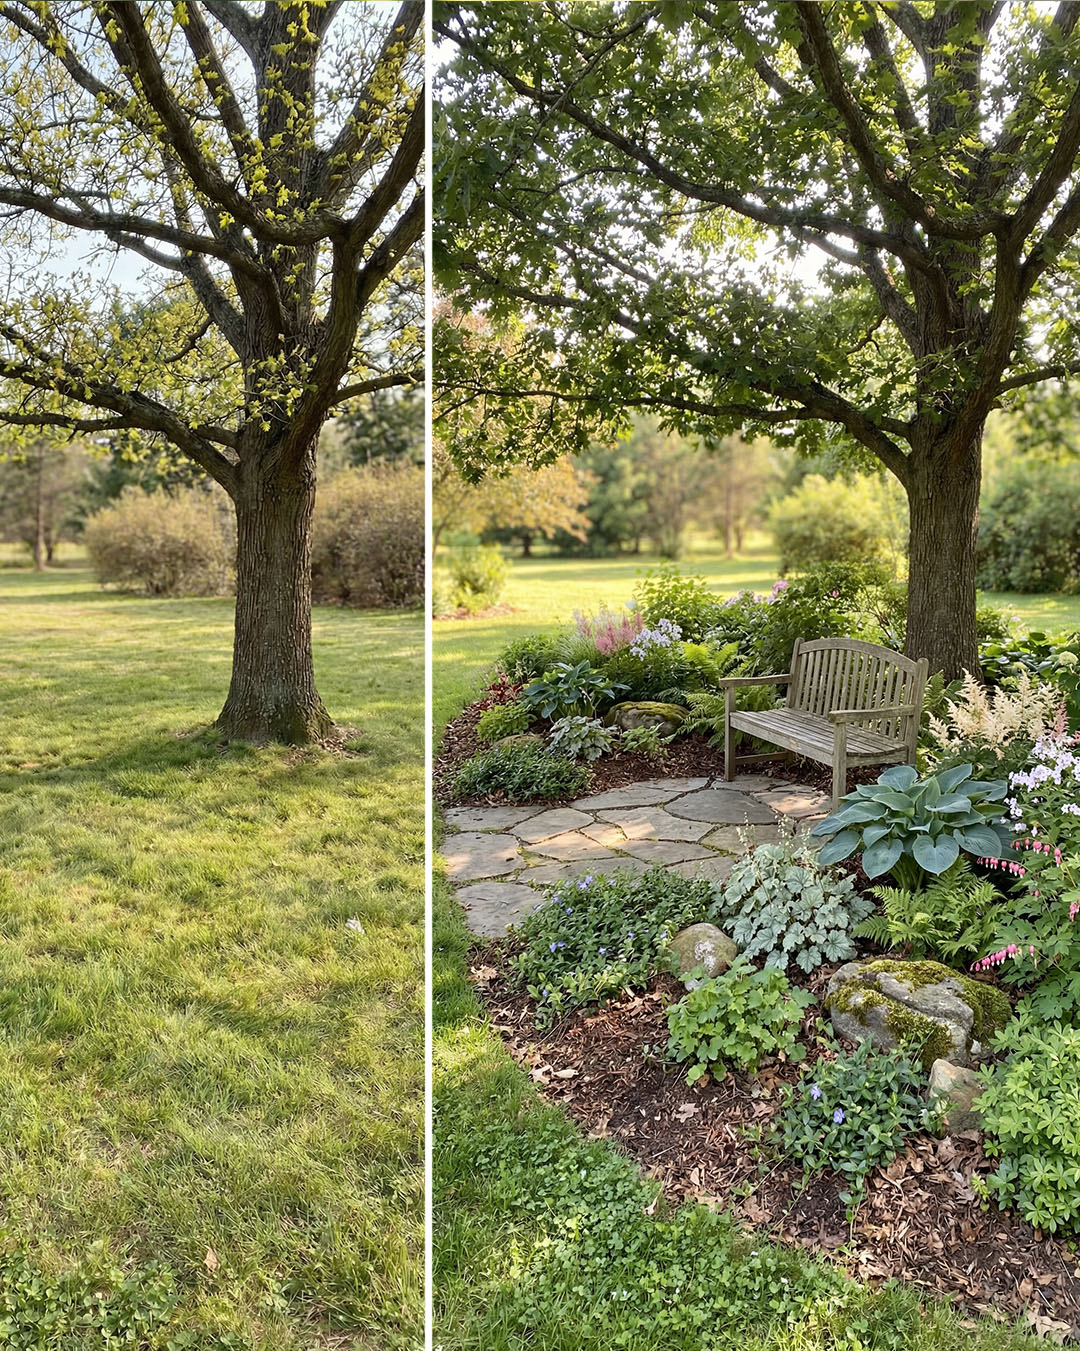
That empty space under a mature tree can feel like a dead zone, but it can become one of the best places in your yard: cool, quiet, and made for slowing down. Here is a simple, practical way to build a shaded seating nook with a small patio and layered shade plants.
Step 1: Pick the exact “rest spot” Stand under the tree at the time of day you would actually use the space (late afternoon is a great test).
Face the view you want: open yard, flower beds, sunset, bird activity. Make sure there is room to comfortably sit and swing your legs without bumping plants.
Step 2: Define the footprint Mark a curved bed edge with a hose or string. Curves feel natural under a tree and help the space look intentional. Plan for two zones: A small hard surface where your feet go (patio path or pad) A planting ring around it for softness and color
Step 3: Handle tree roots the right way Under a tree, digging deep can damage major roots. Keep the build shallow. Remove grass in the bed area by cutting and lifting sod, or smothering with cardboard and a thick layer of wood chips. Avoid deep trenching. Instead, build up slightly with a thin layer of topsoil or compost only where needed. Keep soil additions modest near the trunk so you do not bury the root flare. Leave the base of the trunk visible. Step 4: Create a simple patio “landing” A small landing makes the bench feel like a destination. Use flat stone, large pavers, or flagstone. Level with a thin base of compacted gravel and sand, or use stone dust if you have it. Keep the patio edge irregular or gently curved so it blends into the bed.
Step 5: Place the bench for comfort Set the bench where it stays shaded during the hottest part of the day. Leave a little open space behind it (even 12 to 18 inches) for airflow and easy cleanup.
If the ground is soft, tuck a couple of flat stones under the bench legs so it stays level over time.
Step 6: Build layers with shade plants that actually thrive Aim for three layers so it looks full without being crowded.
Front edge (low, tidy, spill over stone): Creeping jenny, ajuga, sweet woodruff, wild ginger, lamium
Mid layer (texture and color): Heuchera (coral bells), ferns, brunnera, lungwort, hellebores, epimedium Back layer (height and soft blooms):
Astilbe, foxglove (if suitable for your area), hydrangea (if you have enough light), Japanese forest grass
Tip: Repeat 2 to 3 plants in drifts instead of using one of everything. It looks calmer and more designed.
Step 7: Add rocks for structure and a natural look Use a few medium stones or boulders to anchor the bed visually. Group rocks in odd numbers and partially “sink” them so they look like they belong there. Rocks also help protect roots by reducing the urge to dig deeply.
Step 8: Mulch for moisture and less maintenance Spread 2 to 3 inches of wood chips across the planting bed. Keep mulch pulled back from plant crowns and away from the tree trunk.
Mulch helps keep the root zone cool and reduces how often you need to water.
Step 9: Water smart in tree shade Trees drink a lot, so new plants need help at first.
Water new plants slowly at the base so it soaks in, not runs off. Check moisture by pushing a finger down a couple inches. If it is dry there, water.
After plants establish, you will water less often, but more deeply.
Step 10: Add one small “stay a while” detail
Choose one: A small side table or flat stone for a drink A solar path light to make it inviting at dusk A simple stepping stone approach so it feels like a little destination